If you have ever pulled a gorgeous hank out of its twist, blinked once, and somehow ended up holding a yarn jellyfish with tentacles… welcome. You are in very good company. A yarn swift and ball winder combo is one of those tools that feels a little fancy until you use it once and realize it is basically a tangle-prevention superpower.
In this guide, I will walk you through setting up a swift and winder, winding smooth center-pull cakes, and fixing the most common hiccups along the way. This works beautifully for both knitting and crochet, because neat cakes feed evenly and make tension so much more predictable.
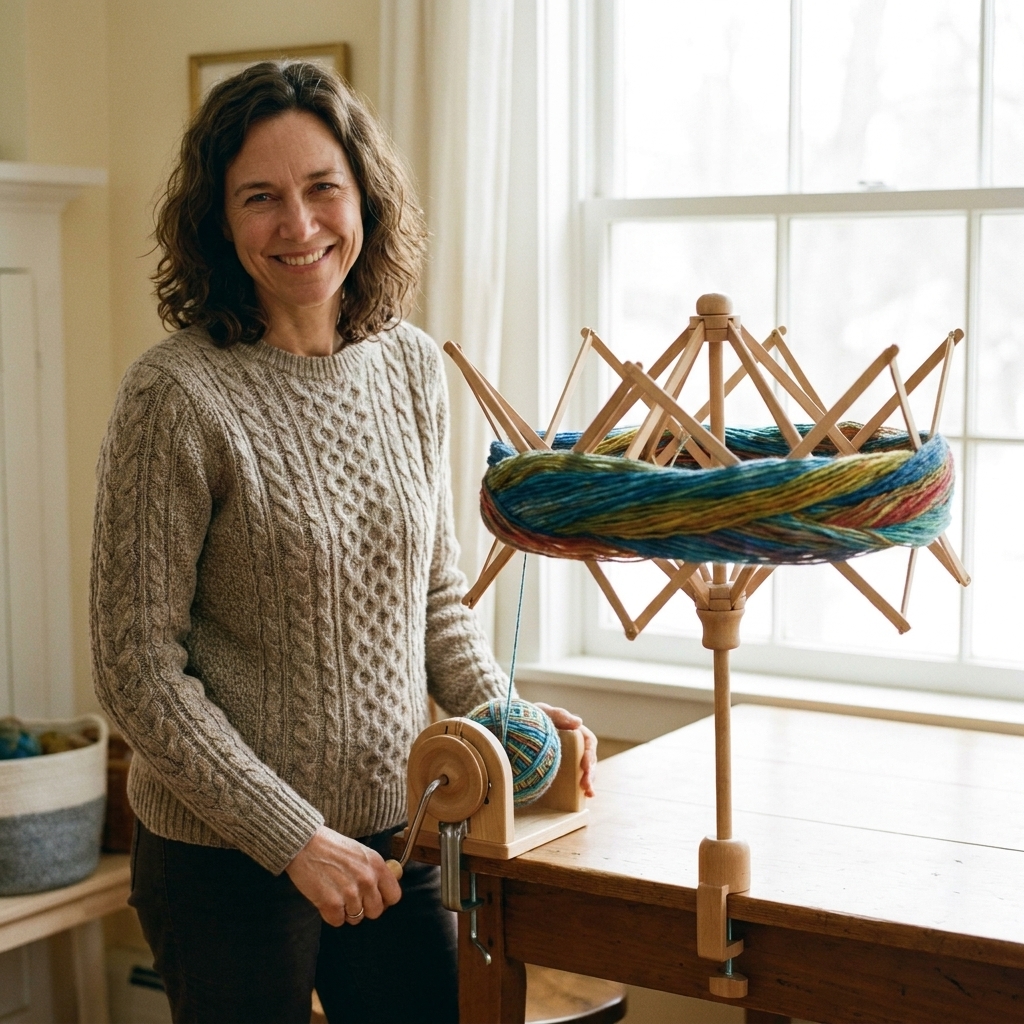
Hank vs ball vs cake
Knowing what you are holding helps you choose the right tool and avoid accidental chaos.
- Hank: A large loop of yarn twisted into a tidy braid. It looks pretty on a shelf and dyes beautifully, but it must be wound before use.
- Ball: A round ball of yarn. Some pull from the outside nicely, but they can roll away like a tiny runaway pet.
- Cake: A squat cylinder shape, usually made with a ball winder. Most cakes allow a center pull, which is why so many of us love them for projects on the go.
A swift’s job is to hold the hank open at a gentle, even tension. The winder’s job is to wrap that yarn into a cake without twisting it up or turning it into a knot festival.
What you need
- Yarn swift (umbrella swift or tabletop Amish swift)
- Ball winder (hand-crank or electric)
- Hank of yarn
- Scissors (for snipping ties, carefully)
Nice-to-haves
- Yarn guide or tension arm (some winders include one)
- Clips or rubber shelf liner to reduce table slipping
- A spare paper tube (if you want a more defined center-pull tube)
If you only have a winder and no swift, you can still wind from a hank, but it is much harder to keep tension consistent without tangles. A swift really is the secret sauce.
Step 1: Set up your swift
First, pick a sturdy surface. Kitchen tables work great. Lightweight card tables… less great, unless you enjoy everything wobbling like a baby deer.
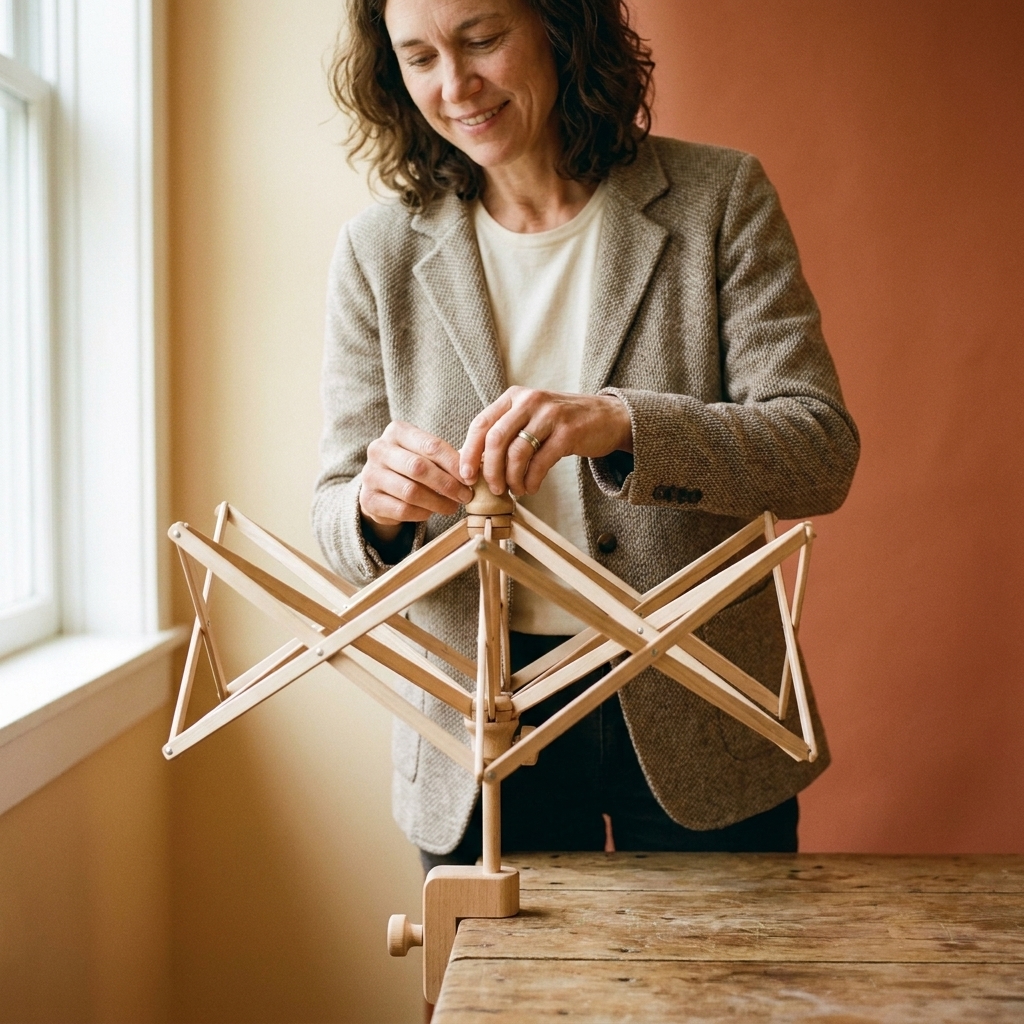
Umbrella swift
Clamp it to the table or set it on a base, depending on your model.
Open the swift by loosening the knob and expanding the arms until it is large enough for your hank.
Lock it in place so it stays open at that size.
Amish swift
Set it on the table with enough space to spin.
Adjust the crossbars so the hank can sit around them without stretching.
Key idea: The hank should be held open snugly, but not stretched tight. If it is under tension like a trampoline, you can distort delicate fibers and make winding feel jerky.
Step 2: Put the hank on the swift
Find the end ties on your hank. Many hanks have 2 to 4 small ties holding strands together.
Slide the hank over the swift so it sits evenly around the arms or crossbars.
Untwist the hank gently so it becomes one big loop around the swift.
Only snip ties when the hank is secure on the swift. This is the single biggest tangle-prevention step.
When you cut the ties, do it slowly and keep your fingers under the tie so you only cut the tie, not the yarn. I have absolutely, definitely, never cut into yarn while feeling very confident. Ahem.
Step 3: Set up your ball winder
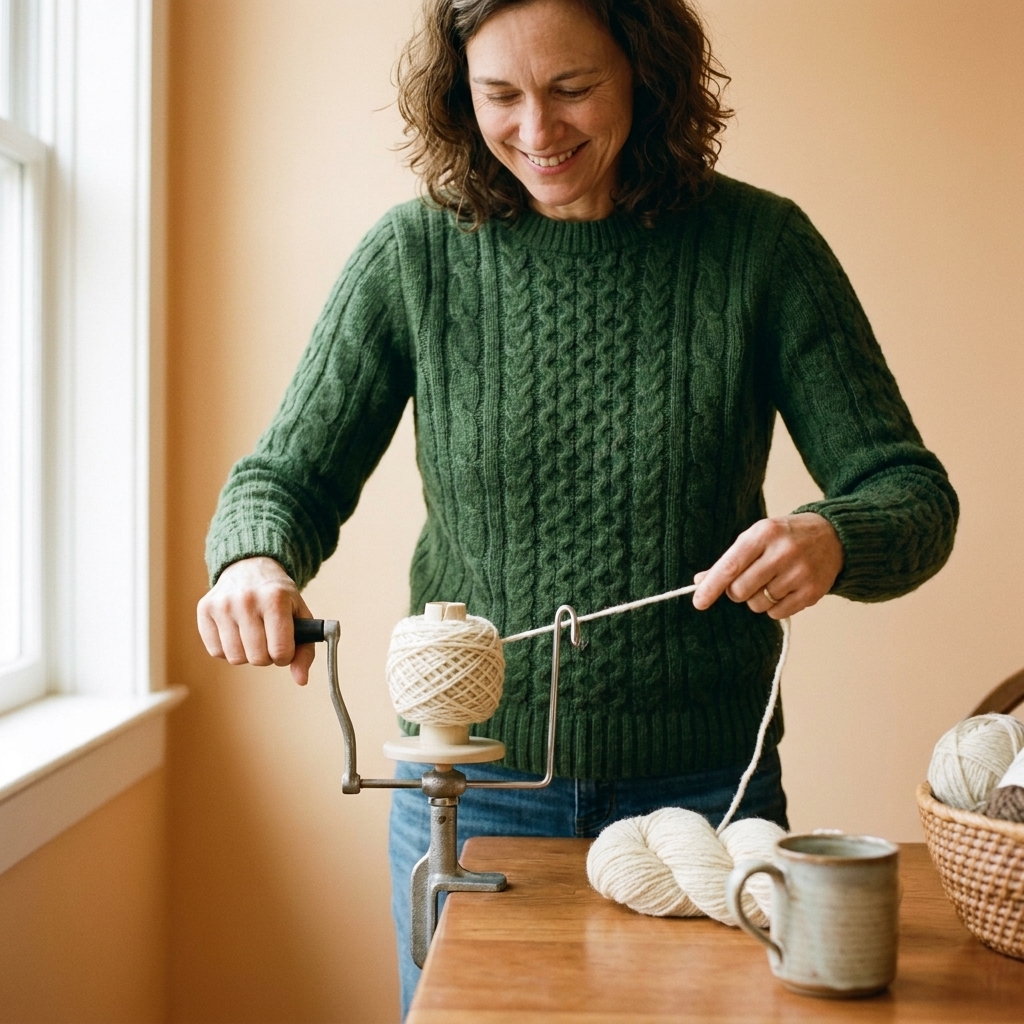
Clamp the winder to the table near the swift. Leave enough space that the swift can spin freely.
Align the yarn path: you want the yarn to travel from swift to winder in a smooth line, without rubbing against chair backs, mug handles, or your cat.
Open the winder’s yarn guide (if it has one) and make sure the bobbin is seated correctly.
Step 4: Find the right yarn end
This is where beginners get tripped up, because a hank can have two ends, and one of them might be tucked in like it is playing hide-and-seek.
Locate an outer end first. Gently separate strands near where a tie was.
Give a tiny pull. The yarn should move and the swift should rotate smoothly.
If the yarn cinches or lifts the whole hank, stop and look for the other end. You may have grabbed an end that is looped around other strands.
Tip: If you are not sure which end is cleaner, pick one, wind a few turns, then pause and confirm the hank is feeding smoothly before you commit.
Step 5: Start the cake
Thread the yarn through the winder’s guide (if present), then into the slot or around the tension piece specified by your model.
Secure the yarn tail to the winder spindle. Many winders have a notch to catch the yarn. If yours does not, hold the tail against the spindle for the first few cranks.
Crank slowly for 10 to 15 turns to form a stable base.
Increase speed gradually, keeping one hand lightly pinching the yarn to add gentle tension and guide it if needed.
Think “steady and smooth,” not “I am auditioning for a yarn-themed Fast and Furious movie.” Going too fast is the easiest way to wind uneven cakes or create slack sections that later collapse into tangles.
Step 6: Keep even tension
This is the difference between a cake that purrs along for the whole project and a cake that barfs yarn loops at you halfway through a sleeve.
- Use light finger tension: Pinch the yarn lightly between thumb and forefinger a few inches before it enters the winder. You are guiding, not squeezing.
- Watch the swift: It should rotate smoothly. If it stutters, something is catching.
- Keep the yarn angle consistent: If the yarn is pulling from the swift at a sharp angle, reposition the winder closer or farther away.
For delicate fibers like single-ply merino, alpaca, or loosely spun artisan yarns: go slower and keep tension extra gentle to prevent stretching or flattening the twist.
Step 7: Finish and secure the end
When you reach the end of the hank, slow down. Ends love to whip around and tangle at the finish line.
Leave a 6 to 8 inch tail, then cut or unloop the final bit from the swift.
Slide the cake off the spindle. Most cakes pop off with a gentle pull.
Secure the outside end by tucking it under a few strands on the outside of the cake.
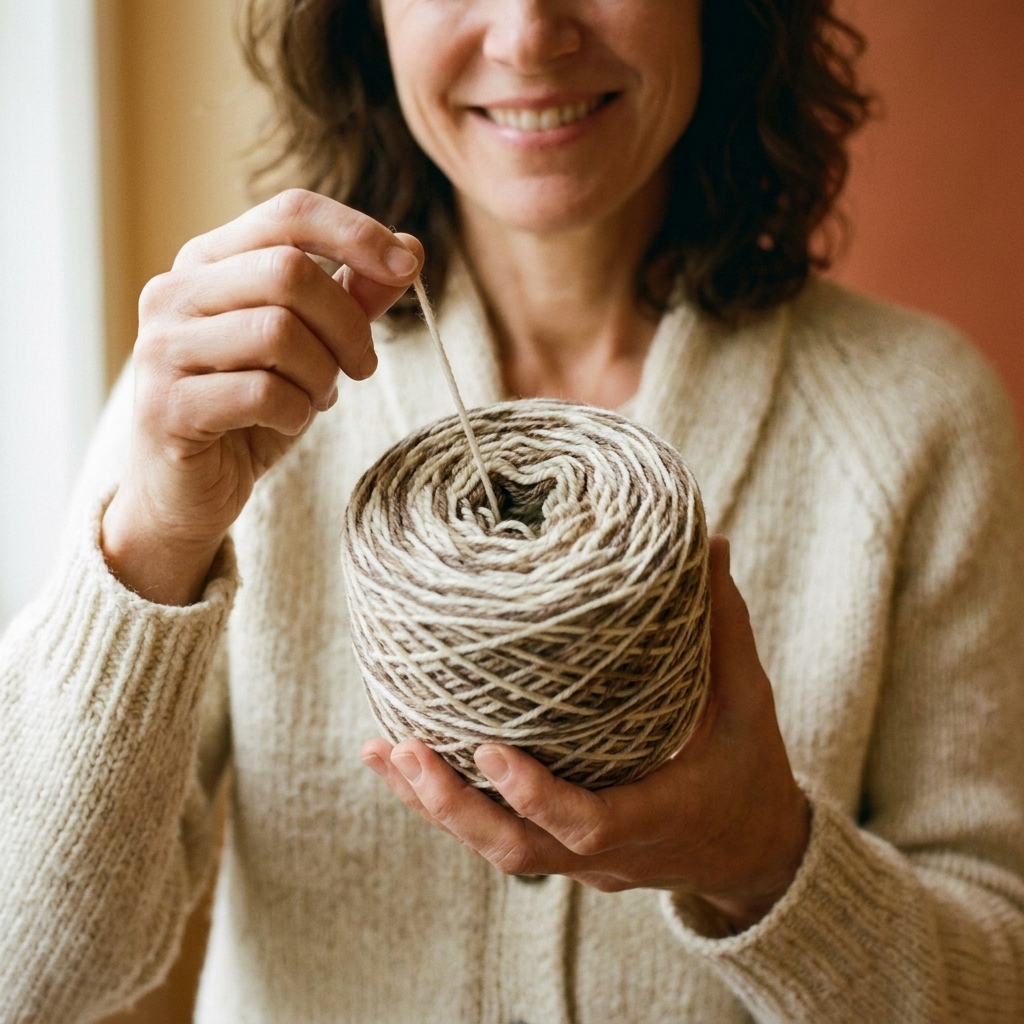
If you want a true center-pull start: find the little dimple at the top or bottom of the cake and gently tease out the center end. Do not yank. Yanking is how you summon the dreaded yarn barf.
Troubleshooting
The swift stops or jerks
- Cause: Yarn caught on a tie you missed, or strands crossed.
- Fix: Stop winding immediately. Rotate the swift by hand and look for the snag. Gently lift and separate strands until the loop moves freely again.
My cake is loose
- Cause: Too little tension while winding, or winding too fast.
- Fix: Add a touch more finger tension and slow down. If the cake is already very loose, consider rewinding it. Yes, it is annoying, but it is less annoying than detangling mid-project.
It tangles near the end
- Cause: The last loop can twist around itself as the hank gets lighter.
- Fix: Slow way down for the last 5 to 10 yards. If needed, lift the final loop off the swift and wind the last bit by hand with controlled tension.
My cake is lopsided
- Cause: Yarn not feeding through the guide correctly, or inconsistent hand position.
- Fix: Re-thread the guide. Keep your pinching hand in the same spot, and let the winder’s guide do the side-to-side work.
I pulled the center end and got yarn barf
- Cause: It happens to the best of us.
- Fix: Lay the cake on the table. Gently pull one loop at a time and wind it back around the cake by hand until it behaves again. Put on a kettle, because patience helps.
Safety and yarn care
- Do not store yarn long-term on a stretched swift. Wind it the same day if you can. Keeping yarn under tension can affect elasticity and memory.
- Be mindful with superwash wool. It can stretch easily. Keep tension light.
- For fragile singles or boucle: Go slow, and consider winding into a looser cake to avoid stressing the structure.
- Check for moth risk. Winding is a great moment to inspect yarn, especially thrifted or long-stashed skeins.
And because I care about your sanity: if you are winding multiple hanks for a sweater, label each cake as you go. Even a simple “sleeve 1” note saves you from playing yarn detective later.
FAQ
Do I need a swift to wind a hank?
You can wind a hank without a swift by looping it around the back of a chair, your knees, or a willing friend. The risk is uneven tension and surprise tangles. A swift keeps the loop open evenly and spinning freely, which is what prevents the snags.
Can I wind a hank into a ball instead of a cake?
Yes. If you prefer a hand-wound ball, you can use the swift to hold the hank and wind by hand. Cakes are just faster and tend to feed more neatly from the center.
Is center-pull always better?
Not always. Center-pull is convenient and portable, but some yarns can collapse if the cake is very soft. If you notice collapsing, try pulling from the outside or rewinding with slightly more tension.
Should I rewind a cake before knitting or crocheting?
If the cake is neat and stable, you are good to go. If it feels squishy, misshapen, or was wound very quickly, rewinding can help even out tension and reduce mid-project tangles. For lace or colorwork, I am more likely to rewind just to start on the calmest footing.
One last tip
When you are learning to use a swift and winder, give yourself permission to go slow. This is not a race. It is a small, satisfying ritual that turns “messy potential” into “ready-to-make magic.” And if you do end up with a minor tangle, it is not a failure. It is just yarn reminding you to breathe.
Have a favorite setup or a hard-won trick that keeps your cakes tidy? Share what kind of swift and winder you use, plus the yarn you are winding, in the comments. Your tip might be the one that saves someone else from the yarn jellyfish life.